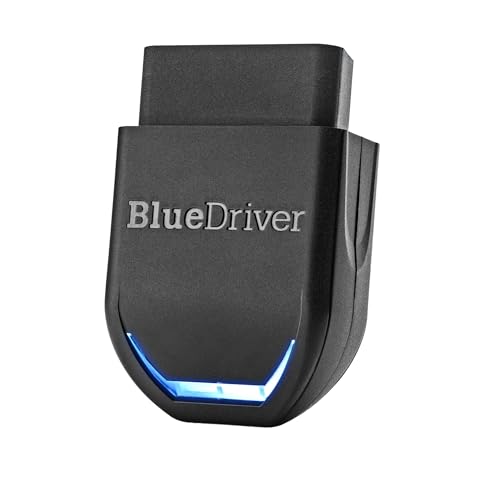
When your check engine light comes on, an OBD2 scanner is the fastest way to find out what your car is trying to tell you. These handy tools plug into a port under your dashboard and pull diagnostic trouble codes straight from your vehicle’s computer, so you can stop guessing and start fixing. The good news is that you don’t need to be a mechanic to use one. With a few simple steps you can read codes, understand what they mean, clear them after a repair, and even watch live engine data while the car runs. This guide walks you through the whole process in plain language so you feel confident the first time you plug in.
Locate the OBD2 Port and Plug In
Every car and light truck sold in the United States from 1996 onward has a standard OBD2 port, also called the data link connector. In most vehicles it sits under the driver’s side dashboard, just above the pedals or near the steering column. Look for a trapezoid shaped 16 pin socket. If you can’t find it there, check behind a small panel, near the center console, or under the ashtray, since some makers tuck it out of sight. Your owner’s manual will show the exact spot if you get stuck.
Once you find the port, take your scanner’s connector and push it in firmly until it seats fully. The shape only fits one way, so you won’t force it in backward. A loose connection is the most common reason a scanner fails to power up, so make sure it clicks into place before you go any further.
Turn the Ignition On and Power Up the Scanner
With the scanner plugged in, turn your ignition key to the on position without starting the engine. This is often called key on, engine off. The dashboard lights should illuminate, which tells you the car’s computer is awake and ready to talk to the tool. Most scanners draw their power directly from the port, so the screen will light up on its own a few seconds later.
Some advanced features, such as reading certain live data streams, may require the engine to be running. For a basic code read, key on with the engine off is usually enough. Give the scanner a moment to establish a connection with the vehicle. It’ll typically ask you to confirm details like the make, model, or engine type, or it may detect the vehicle automatically using the VIN.
Read the Trouble Codes
From the scanner’s main menu, choose the option labeled read codes, trouble codes, or diagnostics. The tool will scan the engine control module and report any stored diagnostic trouble codes. You may see active codes, which relate to a current fault, and pending codes, which flag an issue the computer has noticed but not yet confirmed. Write down every code exactly as it appears, including the letter and all four digits.
If the scanner returns no codes but your check engine light is on, try cycling the ignition off and on, then scan again. If still nothing shows, the issue may be intermittent or tied to a system the basic scan doesn’t cover. Many scanners also show a freeze frame, a snapshot of engine conditions at the moment the fault triggered, which is useful for tracking down the cause.
Interpret the Code Letters and Look Up the Meaning
Every OBD2 code starts with a letter that points to the system involved. P stands for powertrain, covering the engine and transmission, and it makes up the bulk of the codes you’ll see. B means body, for things like airbags and power seats. C means chassis, covering systems such as the brakes and steering. U means network, for communication problems between the car’s control modules.
The first digit after the letter tells you whether the code is generic, shown as a zero and shared across all manufacturers, or maker specific, shown as a one. The remaining digits identify the exact fault. For example, P0301 points to a misfire on cylinder one. To find the full meaning, type the code into a trusted lookup database or use the description built into many modern scanners. A good scanner takes the guesswork out by showing the plain English definition right on the screen.
Clear Codes After a Fix and Check Live Data
Only clear codes once you have actually addressed the underlying problem. Clearing a code simply erases it from memory and turns off the check engine light, but if the fault remains the code will return. To clear, select erase codes or clear codes in the menu and confirm. This also resets the readiness monitors, so the car needs to be driven through a normal cycle before all systems report ready again, which matters if you have an emissions test coming up.
Beyond codes, most scanners offer a live data mode that streams real time readings while the engine runs. Here you can watch values such as engine speed, coolant temperature, fuel trim, oxygen sensor output, and throttle position change as they happen. This view helps you confirm a repair worked or spot a sensor reading that drifts out of range. If you want a tool that handles all of this smoothly, browse our picks for the best obd2 scanners to find one that fits your needs.
Frequently Asked Questions
Do I need to start the engine to read codes?
No. For a standard code read you only need to turn the ignition to the on position so the dashboard lights up. The car’s computer powers the scanner and shares stored codes without the engine running. Some live data features do require the engine to be on, but reading and clearing trouble codes doesn’t.
Will clearing the codes fix my car?
No. Clearing codes only erases the stored fault and turns off the warning light. It doesn’t repair the actual problem. If the underlying issue is still present, the code and the check engine light will come back, often within a few driving cycles. Always diagnose and fix the cause before clearing.
Does an OBD2 scanner work on every car?
It works on virtually all cars and light trucks sold in the United States from 1996 onward, since OBD2 became the required standard that year. Vehicles in other regions adopted similar standards around the early 2000s. Always confirm your car has a 16 pin OBD2 port and that the scanner lists your make and model as compatible.
The Bottom Line
Using an OBD2 scanner comes down to a simple routine: find the port, plug in with the ignition on, read the codes, decode the letters, look up what they mean, fix the fault, then clear the codes and check live data to confirm. Once you have done it once, the whole process takes only a few minutes and saves you from blind guesswork at the repair shop. Keep a scanner in your glovebox and you’ll always have a clear answer the next time that check engine light glows.
Related Guides
- 7 Best OBD2 Scanners for Chevy in 2026 (Researched and Compared)
- 7 Best Bluetooth Car Scanners (Researched and Compared)
- Should You Clear Check Engine Codes Before an Emissions Test
- 7 Best OBD2 Memory Savers (Researched and Compared)
- 7 Best OBD2 Gauge Displays (Researched and Compared)
- 7 Best OBD Scanners for Audi (Researched and Compared)

