Checking your engine oil level is a very important vehicle maintenance tasks you can perform yourself. Regular oil checks help prevent engine damage, extend engine life, and catch potential leaks early. According to the National Highway Traffic Safety Administration (NHTSA), proper oil maintenance is critical for engine longevity and performance.
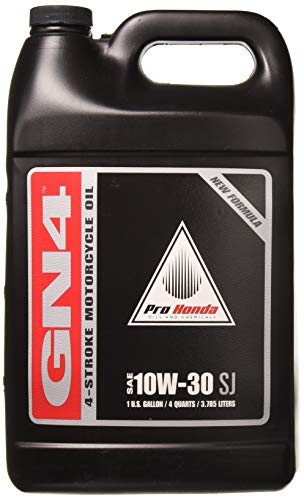
Honda Pro 10W-30 Engine Oil
This guide walks you through the complete process of checking your oil level, interpreting results, and understanding what different readings mean for your vehicle’s health.
Why Regular Oil Checks Matter
Engine oil serves multiple critical functions: it lubricates moving parts, helps cool the engine, removes contaminants, and protects against corrosion. Over time, oil breaks down and levels drop due to normal consumption and minor leaks. The American Petroleum Institute (API) notes that regular oil monitoring is essential for maintaining engine warranty coverage and optimal performance.
Driving with insufficient oil can cause:
- Increased friction between engine components
- Higher engine temperatures and potential overheating
- Accelerated wear on pistons, cylinders, and bearings
- Engine seizure or catastrophic failure in severe cases
Most manufacturers recommend checking oil at least monthly, or before long trips.
Gather Your Materials and Prepare Your Vehicle
Before checking oil, you’ll need a clean cloth or paper towel and optionally a funnel for adding oil if needed. Preparation is equally important as the check itself.
Steps to prepare:
- Park on level, flat ground. Checking on an incline gives inaccurate readings because oil pools unevenly in the pan.
- Wait at least 5 minutes after turning off the engine if it was running. Hot oil can burn and readings may be inaccurate.
- For most accurate results, check oil when the engine is completely cold, such as first thing in the morning before starting the vehicle.
- Open the hood and locate the dipstick. Consult your owner’s manual if unsure of its location.
Most vehicles have a bright yellow or orange handle on the dipstick for easy identification.
Remove and Clean the Dipstick
The dipstick is your primary tool for measuring oil level. Proper removal and cleaning ensures accurate readings.
Procedure:
- Firmly grasp the dipstick handle and pull straight up with steady pressure. It may require more force than expected.
- Once removed, wipe the entire length of the stick with a clean cloth or paper towel, removing all oil residue. This step is critical for an accurate reading.
- Examine the stick for any damage or cracks. A damaged dipstick should be replaced before relying on its readings.
- Look for the minimum and maximum level markings on the stick. These are typically indicated by lines, notches, or the words MIN and MAX.
Some newer vehicles use electronic oil level sensors instead of traditional dipsticks. Consult your owner’s manual to determine which system your vehicle uses.
Reinsert and Read the Dipstick
Reinsertion must be done carefully to get an accurate measurement of your oil level.
Steps:
- Reinsert the dipstick fully into its tube until it seats completely. You should feel resistance when it reaches the bottom.
- Wait a few seconds for the oil to settle on the stick.
- Remove the dipstick again and observe where the oil level reaches on the stick.
- The oil should ideally be at or near the maximum line. Oil between the minimum and maximum lines is acceptable, though levels closer to maximum are preferable.
- If oil reaches below the minimum line, your vehicle needs an oil top-up.
Note: Some dipsticks have two sets of markings, one for cold engine checks and one for warm engine checks. Reference your owner’s manual to determine which applies to your situation.
Understand Cold vs. Warm Oil Readings
The temperature of the oil affects its level reading, and this distinction is important for accuracy.
Cold oil readings (preferred method):
- Performed when the engine hasn’t run for at least several hours, ideally overnight.
- Oil settles completely in the pan, providing the most accurate measurement.
- Most manufacturers specify cold readings as the standard for checking oil level.
Warm oil readings:
- Taken after the engine has run for 5 to 10 minutes and then cooled for 5 minutes.
- Oil is distributed throughout the engine and may show slightly different levels than cold readings.
- Some vehicles include separate warm-oil markings on the dipstick for this scenario.
For consistency and accuracy, always check oil under the same conditions. Cold checks first thing in the morning provide the most reliable baseline for monitoring oil consumption over time.
What to Do If Oil Level Is Low
Low oil requires prompt action. Continuing to drive with insufficient oil risks serious engine damage.
If oil is below the minimum line:
- Purchase the correct oil type for your vehicle. Your owner’s manual specifies the SAE grade (such as 5W-30 or 10W-40). Using incorrect oil can damage your engine.
- Locate the oil filler cap, typically found on top of the engine. It usually displays an oil can symbol.
- Remove the cap and insert a funnel if desired.
- Add oil slowly in small amounts, checking the level with the dipstick after each addition.
- Don’t overfill. Oil above the maximum line can cause foaming, reduced lubrication, and engine damage.
If your oil level drops significantly between checks, or if you notice an oil smell or leak under your vehicle, consult a qualified mechanic to investigate potential leaks or internal oil consumption issues.
Interpreting Oil Condition Beyond Level
While checking level, you should also assess oil condition. The color and consistency of oil on the dipstick provide clues about engine health.
Healthy oil characteristics:
- Golden to amber color when new
- Smooth, consistent texture without gritty particles
- No burnt or unusual odors
Warning signs:
- Very dark brown or black color may indicate the oil is overdue for a change.
- Milky appearance or foamy texture suggests water contamination, often from a head gasket leak.
- Gritty texture indicates metal particles from engine wear.
- Burnt smell suggests overheating or oil degradation.
If you notice any of these warning signs, have your vehicle inspected by a mechanic. Regular oil changes according to your manufacturer’s schedule (typically every 3,000 to 10,000 miles depending on oil type) prevent most oil condition issues.
Frequently Asked Questions
How often should I check my oil?
Most vehicle manufacturers recommend checking oil at least once per month, or before undertaking long road trips. Some owners check weekly as part of routine maintenance. If your vehicle shows signs of oil consumption or has known leaks, check more frequently. Your owner’s manual provides specific guidance for your vehicle model.
Can I check oil while the engine is hot?
While you can check oil after the engine has warmed up, cold checks are more accurate. If you must check warm oil, wait at least 5 minutes after turning off the engine to allow the oil to cool and settle. Hot oil can also burn your skin, so exercise caution. Always reference your dipstick markings, as some vehicles have separate cold and warm indicators.
What does it mean if oil is between the minimum and maximum lines?
Oil between the minimum and maximum marks is acceptable and doesn’t require immediate action. However, oil levels closer to the maximum are preferable for optimal engine protection. If oil is consistently dropping toward the minimum between checks, monitor consumption and investigate for potential leaks or internal oil burning with a mechanic.
Is it normal for oil level to drop over time?
Yes, some oil consumption is normal. Engines typically consume a small amount of oil between scheduled oil changes due to normal combustion and evaporation. However, consumption should be minimal, typically less than one quart per 1,000 miles according to the Society of Automotive Engineers (SAE). Excessive consumption or rapid drops warrant professional inspection for leaks or internal engine issues.
What should I do if I overfill the oil?
If you accidentally add too much oil, don’t drive the vehicle. Overfilled oil can foam, reducing lubrication effectiveness, and may leak from seals or cause engine damage. Remove excess oil by using a turkey baster or siphon pump to extract oil from the dipstick tube, or take the vehicle to a service center for professional removal. Always add oil gradually and check the level frequently to avoid overfilling.
The Bottom Line
Checking your engine oil is a simple yet critical maintenance task that takes only a few minutes and requires no special tools. By following this process regularly, you monitor your engine’s health, catch potential problems early, and protect your investment in your vehicle. Remember to always check oil on level ground with a cold engine for the most accurate readings, and consult your owner’s manual for any vehicle-specific guidance. If you notice unusual oil consumption, discoloration, or any signs of leaks, have a qualified mechanic inspect your vehicle promptly. Regular oil monitoring combined with timely oil changes according to manufacturer schedules is one of the best ways to ensure your engine runs reliably for years to come.


