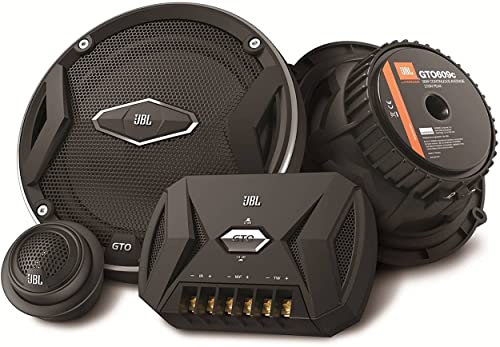
Upgrading your car’s audio system can dramatically enhance your driving experience, transforming mundane commutes into immersive journeys. While many modern vehicles come with decent sound systems, aftermarket speakers often offer superior clarity, bass response, and overall audio fidelity. Installing new car speakers might seem like a daunting task, but with the right tools, a bit of patience, and this guide, it’s a rewarding do-it-yourself project for many automotive enthusiasts.
This informational guide will walk you through each critical step of the speaker installation process, from gathering your necessary equipment to safely removing old components and correctly wiring your new speakers. We’ll focus on best practices to ensure a secure, high-quality installation that will deliver exceptional sound for years to come.
Focal Access 165 AS
Gather Your Tools and Materials
Before you begin, assembling all the necessary tools and materials will streamline your installation process and prevent unnecessary interruptions. Having everything ready ensures a smoother, more efficient upgrade.
- Trim Removal Tools: Essential plastic or nylon pry tools designed to safely remove interior panels without scratching or damaging surfaces.
- Screwdrivers: A set of Phillips head and flathead screwdrivers, and possibly Torx bits, to remove various fasteners.
- Wire Strippers/Crimpers: For preparing speaker wires and securing connections.
- Multimeter: Useful for checking wire polarity and verifying electrical connections.
- Soldering Iron and Solder (Optional but Recommended): For creating highly durable and reliable wire connections.
- Heat Gun (If Soldering): To shrink heat-shrink tubing over soldered connections for insulation.
- Electrical Tape and Zip Ties: For insulating connections and securing wires to prevent rattles.
- New Speakers: Ensure they’re the correct size and type (component or coaxial) for your vehicle.
- Speaker Adapters/Mounting Brackets: Often required to fit aftermarket speakers into factory openings.
- Speaker Wiring Harnesses/Pigtails: These plug into your factory wiring and connect to your new speakers, eliminating the need to cut factory wires.
- Sound Deadening Material: Butyl rubber sheets or spray to reduce vibrations and improve sound quality.
- Butyl Rope/Foam Gaskets: To create a seal between the speaker and the mounting surface.
Prioritizing Safety: Disconnecting the Vehicle's Power
Safety is paramount when working on any automotive electrical system. The most crucial first step in any speaker installation is to disconnect the vehicle’s battery. This prevents accidental short circuits, electrical damage to components, and potential injury.
Locate your vehicle’s battery, typically under the hood or in the trunk. Using a wrench, loosen the nut on the negative (–) terminal and carefully remove the cable. Tuck the cable away from the battery post to ensure it can’t accidentally reconnect. This simple step, in line with general automotive repair best practices, eliminates the risk of electrical shock and protects your vehicle’s sensitive electronic systems, including potential airbag deployment.
Accessing and Removing Your Vehicle's Existing Speakers
Once the battery is safely disconnected, you can begin accessing the factory speakers. This process varies significantly depending on your vehicle’s make and model, and whether you’re replacing door, dash, or rear deck speakers.
- Door Speakers: Carefully use your trim removal tools to pry off interior door panels. Start from an inconspicuous edge and work your way around, disengaging clips. You may need to remove screws hidden behind trim pieces or door handles. Once the panel is loose, disconnect any electrical connectors for window switches, door locks, or courtesy lights.
- Dash Speakers: These often require prying off dashboard grilles or removing dashboard panels. Consult your vehicle’s service manual if you’re unsure of the fastener locations.
- Rear Deck Speakers: Typically accessed by removing the rear seat backrest and then the rear deck panel.
After gaining access, you’ll see the factory speaker. Unscrew the mounting bolts or clips holding it in place. Carefully disconnect the wiring harness connected to the speaker. Inspect the speaker opening for any debris or moisture and note the factory wiring colors for positive and negative connections if you aren’t using a wiring harness.
Preparing the Speaker Mounting Location
With the old speakers removed, it’s an opportune time to prepare the mounting location for optimal sound performance. This preparation can significantly impact the sound quality of your new speakers.
- Clean the Area: Thoroughly clean the speaker opening and surrounding metal or plastic surfaces. Remove any dust, dirt, or old adhesive residue.
- Apply Sound Deadening: This is a highly recommended step. Cut and apply sound deadening material (butyl rubber sheets) to the metal panel around the speaker opening. This reduces vibrations, road noise, and prevents sound waves from escaping into the door panel, directing them into the cabin instead. The result is tighter bass and clearer mid-range frequencies.
- Install Speaker Adapters/Mounts: If your new speakers aren’t a direct fit, install the appropriate speaker adapters or mounting brackets. These ensure your new speakers fit securely and are properly aimed. Use butyl rope or foam gaskets around the adapter to create an airtight seal between the adapter and the mounting surface, further improving bass response.
Wiring and Securing Your New Speakers
This is where your new speakers come to life. Correct wiring is critical for proper sound reproduction and system longevity.
- Connect Wiring Harnesses: If using speaker wiring harnesses, connect one end to your new speaker and the other to the factory wiring connector. Ensure polarity is correct (positive to positive, negative to negative). Most aftermarket speakers will have terminals clearly marked. The larger terminal is typically positive.
- Direct Wiring (If Not Using Harnesses): If you’re connecting directly, strip about half an inch of insulation from the speaker wires. Connect the positive (+) wire from the car to the positive terminal of the new speaker, and the negative (–) wire to the negative terminal. Use high-quality crimp connectors or, for the most durable connection, solder the wires together. Properly insulating these connections with heat-shrink tubing or electrical tape is crucial to prevent shorts, which can damage your audio equipment or even lead to fire hazards, as emphasized in general automotive electrical safety guidelines.
- Mount the New Speakers: Carefully place the new speaker (with its adapter, if used) into the prepared opening. Align the mounting holes and securely fasten the speaker using the provided screws or bolts. Don’t overtighten, as this can damage the speaker frame or mounting surface.
- Initial Test: Before reassembling the entire panel, temporarily reconnect the battery and briefly test the speakers to ensure they’re working. Check for sound, proper balance, and clarity. Then, disconnect the battery again before proceeding with reassembly.
Reassembly and Final System Checks
With the new speakers wired and secured, it’s time to put everything back together and perform a thorough final check.
- Reattach Interior Panels: Carefully reconnect any electrical connectors for window switches or door locks to the door panel. Align the panel clips with their corresponding slots on the door frame and firmly press the panel back into place. Reinstall any screws or trim pieces that were removed. Take your time to ensure all clips engage properly to prevent rattles.
- Reconnect Battery: Once all panels are securely reassembled, reconnect the negative battery terminal and tighten the nut.
- Final Audio Test: Turn on your vehicle’s audio system. Test all speakers individually using the balance and fade controls. Listen for clear sound, proper bass response, and ensure there are no buzzing or rattling noises from the panels. Adjust your head unit’s settings to optimize the sound for your new speakers.
Congratulations! You have successfully installed your new car speakers. Enjoy the enhanced audio experience on your next drive.
Frequently Asked Questions
Do I need a professional to install car speakers?
Many car speaker installations are well within the capabilities of a DIY enthusiast with basic tools and some patience. This guide provides the necessary steps to help you complete the job yourself. However, complex systems or custom installations may benefit from professional expertise.
What is speaker polarity and why is it important?
Speaker polarity refers to the positive (+) and negative (–) terminals on a speaker. It’s crucial that all speakers in your system are wired with the correct polarity. Incorrect polarity can cause speakers to be out of phase, leading to diminished bass response, distorted sound, and a generally poor audio experience.
Should I use sound deadening when installing new speakers?
Yes, sound deadening is highly recommended. Applying sound deadening material to the metal panels around your speakers helps to reduce vibrations, prevent panel rattles, and improve the overall sound quality by directing more sound energy into the cabin and enhancing bass response. It’s an investment that pays off in audio clarity.
How do I know if my new speakers will fit my car?
You need to know the size (diameter) and mounting depth of your factory speakers. Most aftermarket speaker manufacturers provide compatibility charts or databases. You can also measure your factory speakers. Speaker adapters or mounting brackets are often available to help fit common aftermarket sizes into less common factory openings.
What's the difference between crimping and soldering speaker wires?
Crimping involves using a tool to compress a metal connector onto a wire, creating a mechanical and electrical connection. Soldering uses heat to melt solder, forming a metallurgical bond between wires. Soldering generally provides a more durable, corrosion-resistant, and electrically superior connection, making it often preferred for long-term reliability in automotive applications.
The Bottom Line
Installing new car speakers is a fantastic way to revitalize your vehicle’s audio system, delivering a noticeable improvement in sound quality and enjoyment. By carefully following the steps outlined in this guide, prioritizing safety, and using the right tools, you can achieve a professional-grade installation yourself. Take pride in your upgraded audio and enjoy every note and beat on your drives. Remember, attention to detail, especially with wiring and panel reassembly, will ensure a flawless and rattle-free listening experience.