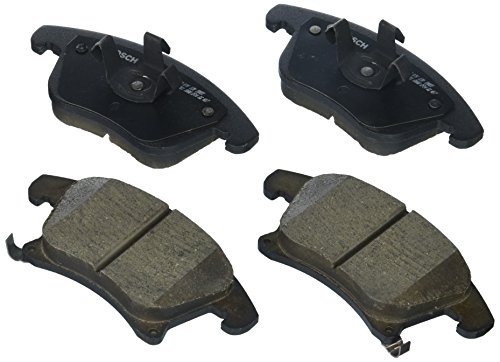
Installing new brake pads and rotors is a great way to restore stopping power, but the job isn’t done until you bed them in. Bedding in is the process of transferring an even layer of pad material onto the rotors. This creates the friction surface that gives you strong, quiet braking. Skip this step, and you may end up with a shaky pedal, poor performance, and annoying squeal that could have been avoided.
Why Bedding In Matters
New pads and rotors have smooth surfaces that don’t grip well together. Without bedding, the pad material deposits unevenly on the rotor, leading to hot spots. These hot spots cause vibration through the pedal and steering wheel, and they can also make the brakes noisy. Proper bedding avoids these issues and helps the brakes work consistently from the first stop to the last.
Another key reason: the resins and binders in new pads need to outgas. If they don’t, they can create a slippery layer between pad and rotor, reducing friction. Bedding burns off these gases and lays down a uniform transfer film.
Preparation Before You Start
Find a quiet, empty stretch of road with no traffic and no pedestrians. You’ll need space to get up to speed and then slow down without interruption. Make sure your brake system is otherwise in good shape: proper fluid level, no leaks, and the wheels are torqued correctly. It’s also wise to check that all lug nuts are tight and that the car is safe to drive.
For the procedure, you’ll be doing a series of moderate to firm stops, so make sure there is plenty of open road ahead. Avoid doing this in wet conditions or on loose surfaces, as that will reduce the effectiveness of the process.
The Bedding Procedure
Here is a widely accepted method that works for most street and track pads. Always follow any specific instructions that came with your pads, but if not, use this:
- Accelerate smoothly to about 45 mph.
- Use moderate pressure to bring the car down to about 5 mph. Do not come to a complete stop. The pressure should be firm enough to activate the brakes, but not hard enough to trigger ABS.
- Accelerate back to 45 mph and repeat the slow-down. Do this about 8 to 10 times. The brakes will start to feel more responsive as the material transfers.
- Then, increase your speed to about 60 mph and do a few harder stops down to 10 mph. This builds more heat and helps the transfer film cure.
- Finally, drive around for a few minutes without using the brakes if possible, to let them cool down. Avoid coming to a full stop while they are hot, as that can leave pad material deposits in one spot.
You’ll notice a faint smell of hot brakes during the process. That is normal and part of the curing. If you see smoke, you may be braking too hard or too often. Back off and give them a chance to cool.
After Bedding In: What to Expect
Right after the process, the brakes may feel slightly grabby until they fully cool and settle. That is normal. Once they cool, you should notice a consistent pedal feel and quiet operation. Some pads, especially performance-oriented ones, may need a second, lighter round of bedding after a few hundred miles. Check your pad manufacturer’s guidance if you have it.
If you experience a pulsing pedal or vibration after bedding, it could be that the rotors were not clean or the process was interrupted. In that case, you may need to repeat the procedure on a perfectly clean rotor surface. If the problem persists, there could be another issue, such as uneven rotor thickness or a stuck caliper.
Common Mistakes to Avoid
Many home mechanics skip the bedding or do it incorrectly. The biggest mistake is coming to a complete stop during the heat-up cycle. Holding the brakes while the car is stationary transfers pad material unevenly and can cause a judder.
Another mistake is doing the procedure on a busy road. You need to focus on the process, not on traffic. Also, avoid bedding in new rotors with old pads, or new pads with old rotors. The surfaces are already worn in patterns that may not match, and that will cause noise and vibration. Always bed in a matched set.
Finally, don’t rush. The whole process takes about 15 to 20 minutes. Taking your time ensures the best result.
Frequently Asked Questions
How long does it take to bed in new brakes?
The actual bedding procedure takes about 15 to 20 minutes of driving. However, the pads and rotors will continue to settle over the first 100 to 200 miles, so expect improvements in feel and noise reduction during that time.
Can you bed in brakes by driving normally?
Normal driving does not generate enough heat or consistent pressure to properly transfer pad material. The result is often uneven deposits, which can cause vibration and squeal. A dedicated bedding procedure is recommended for best performance.
What if my brakes still squeal after bedding?
If squealing persists, check that the pads are properly installed and that there are no glazed surfaces. Sometimes, a second bedding cycle helps. If the noise continues, it could be due to pad material or an issue with the rotors, and you may need to consult a professional.