The illumination of your vehicle’s Check Engine Light (CEL), often an amber or yellow icon resembling an engine, is a clear signal from your car’s onboard diagnostic system that something is amiss. While it can induce anxiety, it’s crucial to understand that this light is a valuable communication tool designed to alert you to potential issues ranging from minor inconveniences to serious mechanical problems that could impact performance, fuel economy, or emissions.
This guide will walk you through the essential steps for understanding, diagnosing, and ultimately, safely clearing a Check Engine Light, always emphasizing the importance of addressing the underlying problem first. Ignoring the CEL or simply clearing it without a proper diagnosis can lead to more significant, and potentially more expensive, repairs down the line.
ANCEL X7 Bidirectional Scan Tool
Understanding Your Check Engine Light (CEL)
The Check Engine Light is part of your vehicle’s On-Board Diagnostics (OBD-II) system, which has been standard on all cars and light trucks sold in the United States since 1996. The OBD-II system continuously monitors various engine components, sensors, and emission control systems. When it detects a fault that could lead to increased emissions or affect engine performance, it stores a Diagnostic Trouble Code (DTC) in the vehicle’s computer (Engine Control Unit or ECU) and illuminates the CEL.
The purpose of the CEL isn’t to scare you, but to provide an early warning. A steady light indicates a non-critical but persistent problem that needs attention. A flashing or blinking light, however, signifies a severe misfire or other critical issue that could be causing catastrophic damage to your catalytic converter or other vital components, and requires immediate attention.
The Golden Rule: Diagnose Before You Clear
The most critical step when your Check Engine Light illuminates is diagnosis, not immediate clearing. Clearing the light without understanding and addressing the root cause is akin to turning off a smoke detector without putting out the fire. The underlying problem will persist, potentially worsening over time and leading to more significant damage or even a vehicle breakdown.
The OBD-II system, standardized by organizations like the Society of Automotive Engineers (SAE), provides a wealth of information through its DTCs. These codes are specific numerical or alphanumeric identifiers that pinpoint the area of the fault. For example, a common code might be P0420, indicating ‘Catalyst System Efficiency Below Threshold (Bank 1),’ which suggests an issue with the catalytic converter or its related sensors.
Using an OBD-II Scanner for Diagnosis
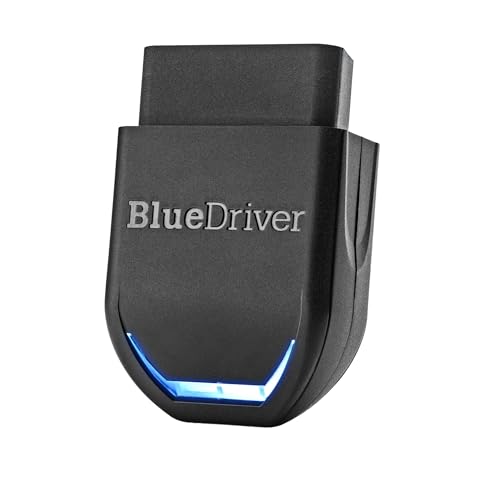
An OBD-II scanner is an indispensable tool for any vehicle owner when facing a Check Engine Light. These devices range from simple code readers to advanced diagnostic tools that can display live sensor data. They connect to a standardized 16-pin diagnostic port, typically located under the dashboard on the driver’s side.
- Connecting the Scanner: With the ignition off, plug the scanner into the OBD-II port.
- Reading Codes: Turn the ignition to the ‘ON’ position (don’t start the engine unless the scanner prompts you). Follow the scanner’s instructions to ‘Read Codes’ or ‘DTCs’.
- Interpreting Codes: The scanner will display one or more alphanumeric codes (e.g., P0301). You can then use the scanner’s built-in database or an online resource to understand what each code signifies. Remember that a single DTC might point to multiple potential causes, and sometimes, a series of codes can help narrow down the problem.
- Checking Readiness Monitors: After clearing codes or making a repair, the ECU needs to complete a ‘drive cycle’ to re-evaluate all systems. The scanner can show ‘readiness monitors’ that indicate whether these self-tests have passed. This is particularly important for state emissions inspections.
Common Issues That Trigger the CEL (and Their Fixes)
Many CEL triggers are relatively minor and can be fixed without extensive mechanical knowledge, though some require professional attention. Here are a few common culprits:
- Loose or Faulty Gas Cap: This is a very frequent and simplest causes. A loose or damaged gas cap can allow fuel vapors to escape, triggering an evaporative emissions (EVAP) system fault. Fix: Tighten or replace the gas cap.
- Faulty Oxygen Sensor: Oxygen (O2) sensors monitor the amount of unburnt oxygen in the exhaust. A bad sensor can lead to poor fuel economy and increased emissions. Fix: Replace the faulty O2 sensor.
- Bad Spark Plugs or Ignition Coils: These components are crucial for proper engine combustion. Misfires can trigger the CEL. Fix: Replace worn spark plugs or faulty ignition coils.
- Mass Airflow (MAF) Sensor Failure: The MAF sensor measures the amount of air entering the engine. A faulty sensor can lead to incorrect fuel mixture. Fix: Clean or replace the MAF sensor.
- Catalytic Converter Issues: This is often a more serious and costly repair. The catalytic converter reduces harmful exhaust gases. Failure can be caused by long-term neglect of other engine issues. Fix: Professional diagnosis and replacement.
Methods for Safely Clearing the Check Engine Light
Once you have diagnosed the problem and performed the necessary repair, you can proceed to clear the Check Engine Light. Note that if the repair was successful, the light might turn off on its own after a few drive cycles, but manually clearing it confirms the fix and resets the system.
- Using an OBD-II Scanner (Recommended Method): This is the safest and most efficient way. After connecting the scanner and reading the codes (confirming the original codes are gone or the repair addresses them), most scanners have an option to ‘Clear Codes’ or ‘Erase DTCs’. Select this option, and the CEL should turn off. This method specifically resets the fault codes without affecting other vehicle settings.
- Disconnecting the Battery (Use with Caution): Disconnecting the negative terminal of your car’s 12-volt battery for 15-20 minutes can also clear the CEL. However, this method has significant drawbacks:
- It erases all stored fault codes, making it harder to diagnose if the problem returns.
- It resets your vehicle’s ECU, meaning the car will need to ‘re-learn’ driving parameters, which might temporarily affect performance or fuel economy.
- It can reset other electronic systems, such as radio presets, clock settings, and anti-theft systems, potentially requiring security codes to reactivate.
- It resets ‘readiness monitors,’ which means your car won’t pass an emissions inspection until it completes several drive cycles to reset these monitors.
Given these drawbacks, disconnecting the battery should generally be a last resort or used only when you’re certain of the repair and understand the implications.
After Clearing: What to Expect and Next Steps
After successfully clearing the Check Engine Light, it’s essential to monitor your vehicle’s performance. Drive your car as you normally would for several days. During this time, the ECU will be running its self-tests and setting the ‘readiness monitors’ for various systems. If the underlying problem was truly resolved, the light should remain off.
If the Check Engine Light reappears, it indicates that the initial diagnosis or repair was either incomplete, incorrect, or that another issue has developed. In such cases, re-scan for new or recurring DTCs. If the problem persists or you’re uncertain about the diagnosis, it’s always advisable to consult with a certified automotive technician. They have access to advanced diagnostic tools and specialized knowledge to accurately pinpoint complex issues, ensuring your vehicle remains safe and compliant with environmental regulations, as outlined by agencies like the National Highway Traffic Safety Administration (NHTSA) regarding vehicle safety and emissions standards.
Frequently Asked Questions
Is it safe to drive with the Check Engine Light on?
It depends on the nature of the light. A steady CEL indicates a non-critical issue that should be addressed soon. A flashing or blinking CEL, however, signals a severe problem (like an engine misfire) that could be causing serious damage to your catalytic converter. In this case, you should pull over safely and have the vehicle towed to a repair shop immediately.
Will disconnecting the battery clear the Check Engine Light?
Yes, disconnecting the battery for a short period (typically 15-20 minutes) can clear the Check Engine Light. However, this method also resets other vehicle electronics, erases all stored diagnostic codes, and resets readiness monitors, which can complicate future diagnosis and prevent your car from passing an emissions test immediately.
How long does it take for a Check Engine Light to reset after a repair?
If the repair successfully fixed the issue, the Check Engine Light may turn off on its own after a few ‘drive cycles.’ A drive cycle involves starting the car, driving it under various conditions (city, highway, idle), and shutting it off. This process allows the car’s computer to re-run all diagnostic tests. Manually clearing the light with an OBD-II scanner is a quicker way to confirm the repair.
Can I diagnose a Check Engine Light myself?
Yes, you can often perform an initial diagnosis yourself using an OBD-II scanner to retrieve Diagnostic Trouble Codes (DTCs). These codes provide valuable information about the system or component that has a fault. However, interpreting these codes and accurately identifying the root cause often requires further testing and mechanical knowledge, so professional assistance may still be needed.
Can a loose gas cap really cause a Check Engine Light?
Absolutely. A loose, damaged, or missing gas cap can prevent the evaporative emissions (EVAP) system from maintaining proper pressure. This leak can trigger a Check Engine Light because the system detects an emissions-related fault. Tightening or replacing the gas cap is often a quick and easy fix for this common issue.
The Bottom Line
The Check Engine Light is an integral part of your vehicle’s health monitoring system, providing vital feedback on potential issues. While it can be tempting to simply clear the light, remember that true resolution comes from proper diagnosis and repair of the underlying problem. Utilize an OBD-II scanner to understand the Diagnostic Trouble Codes, address the necessary repairs, and then safely clear the light. By following these steps, you ensure your vehicle operates efficiently, safely, and compliantly, extending its lifespan and protecting your investment.