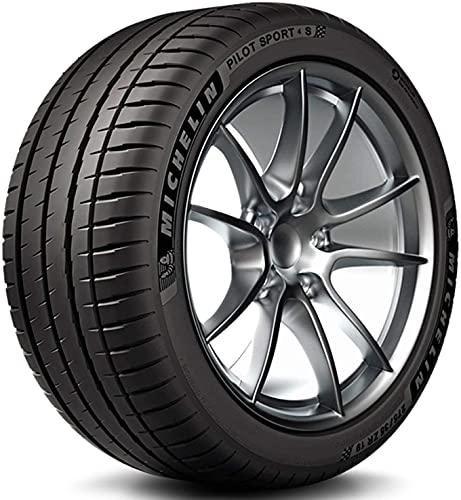
Tire tread depth is a critical factor in vehicle safety and performance, yet it’s often overlooked by many drivers. The tread on your tires is responsible for providing traction, channeling water away from the tire’s contact patch, and ensuring effective braking. As tires wear down, their ability to perform these vital functions diminishes, increasing the risk of hydroplaning, reduced braking efficiency, and loss of control, especially in adverse weather conditions.
Michelin Pilot Sport 4
Understanding how to accurately measure your tire tread depth is a fundamental skill for any vehicle owner. This guide will walk you through various methods, from quick visual checks to more precise measurements using specialized tools, helping you determine when it’s time to consider tire replacement to maintain optimal safety and compliance with US regulations.
Why Tire Tread Depth is Crucial for Safety
The tread pattern on your tires isn’t just for aesthetics; it’s a sophisticated design engineered to maximize grip on various road surfaces. Deep treads provide numerous safety benefits:
- Enhanced Traction: Deeper treads offer more biting edges and sipes, improving grip on dry, wet, and snowy roads.
- Hydroplaning Resistance: The grooves in your tire tread are designed to evacuate water from beneath the tire, preventing hydroplaning where the tire loses contact with the road surface due to a layer of water. As tread depth decreases, the tire’s ability to channel water effectively is significantly reduced.
- Braking Performance: Adequate tread depth allows for shorter stopping distances, particularly on wet pavement. Worn tires require a greater distance to stop, which can be critical in emergency situations.
- Legal Compliance: In the United States, the National Highway Traffic Safety Administration (NHTSA) and state regulations generally consider 2/32 of an inch (1.6 mm) as the minimum legal tread depth. Driving with tires below this limit can result in fines and is a significant safety hazard.
Regularly checking your tire tread depth is a simple, proactive measure that can significantly contribute to your safety and the safety of others on the road.
Understanding Tire Tread Wear Indicators (TWIs)
Before reaching for any tools, it’s helpful to know about built-in indicators on your tires. All tires sold in the US are manufactured with Tread Wear Indicators (TWIs), also known as wear bars. These are small, raised bars molded into the main grooves of the tire tread, typically found at 2/32 of an inch (1.6 mm) above the base of the groove.
- What They Look Like: TWIs appear as flat rubber bars running perpendicularly across the tread grooves.
- How to Spot Them: Look for the TWI mark (often a small triangle or the manufacturer’s logo) on the tire’s sidewall. If you follow that mark directly into the tread, you’ll find the wear bar.
- What They Mean: When your tire tread has worn down to the point where these wear bars are flush with the adjacent tread blocks, it indicates that your tire has reached the legal minimum tread depth of 2/32 of an inch. At this point, tire replacement is strongly recommended by NHTSA and often legally required.
While TWIs provide a quick visual cue, they only tell you if you’re at or below the critical 2/32 inch mark. For more precise measurements or to track wear before it becomes critical, other methods are necessary.
The Penny Test: A Quick and Simple Check
The penny test is a widely recognized and convenient method for a quick assessment of your tire tread depth. It’s a useful tool for determining if your tires are at or below the 2/32 inch threshold.
How to Perform the Penny Test:
- Find a Penny: Grab a standard US penny.
- Locate a Tread Groove: Choose a main tread groove on your tire. Avoid areas with tread wear indicators or unusually worn spots if you’re trying to get an average reading.
- Insert the Penny: Turn the penny so that Abraham Lincoln’s head is pointing down into the tread groove.
- Observe Lincoln’s Head:
- If you can see all of Lincoln’s head: This indicates that your tread depth is less than 2/32 of an inch. Your tires are worn and should be replaced immediately.
- If Lincoln’s head is partially obscured: This suggests your tread depth is at or above 2/32 of an inch. While this means you’re above the legal minimum, it’s still advisable to monitor your tires closely, especially if you frequently drive in wet conditions.
- Check Multiple Spots: Repeat this process in several different places around each tire to account for uneven wear.
While the penny test is simple and effective for identifying critically worn tires, it’s important to remember its limitation: it only tells you if you’re at or below 2/32 inch. It doesn’t provide a precise measurement of how much tread you have left above that minimum.
Using a Tire Tread Depth Gauge for Precision
For a more accurate and precise measurement of your tire tread depth, a dedicated tire tread depth gauge is the recommended tool. These inexpensive devices provide a numerical reading, allowing you to track wear more effectively and make informed decisions about tire replacement.
Types of Tread Depth Gauges:
- Digital Gauges: Offer an easy-to-read display, often with both inch and millimeter readings. They’re generally very accurate.
- Analog (Dial) Gauges: Feature a needle on a circular dial, similar to a pressure gauge. They’re also accurate and durable.
- Stick Gauges: The simplest and most affordable type, with a sliding indicator that shows the depth on a numbered stick.
How to Use a Tread Depth Gauge:
- Ensure Safety: Park your vehicle on a level surface and engage the parking brake.
- Locate a Tread Groove: Select a main tread groove, avoiding any wear bars or areas of obvious damage.
- Insert the Probe: Push the gauge’s probe (the thin metal pin) firmly into the deepest part of the tread groove, making sure the base of the gauge is flat against the top of the tread block.
- Take the Reading:
- Digital Gauge: The reading will appear on the display.
- Analog Gauge: Read the number indicated by the needle on the dial.
- Stick Gauge: The sliding indicator will show the measurement.
- Remove and Reset: Carefully remove the gauge. Most gauges will reset automatically or have a reset button.
- Check Multiple Spots: Measure at least three to four different points around the circumference of each tire, as tires can wear unevenly. Also, check both the inner and outer edges of the tread.
Record your measurements. Consistent readings below 4/32 of an inch, especially in wet climates, or any reading at or below 2/32 of an inch, indicate a need for tire replacement.
When to Replace Your Tires
Knowing your tire tread depth is only half the battle; understanding when to act on those measurements is equally important. Tire replacement decisions should be based on a combination of legal minimums, safety recommendations, and the presence of uneven wear.
- The 2/32 Inch Rule (Legal Minimum): As established by NHTSA, 2/32 of an inch (1.6 mm) is the minimum legal tread depth in most US states. When your tires reach this depth, the wear bars will be flush with the tread surface. At this point, your tires offer significantly reduced traction and hydroplaning resistance, making them unsafe and due for immediate replacement.
- The 4/32 Inch Recommendation (Wet Weather Safety): Many automotive experts, including organizations like The Tire Industry Association (TIA), recommend replacing tires when their tread depth reaches 4/32 of an inch (3.2 mm), especially if you frequently drive in wet conditions. Studies show that a tire’s ability to evacuate water and resist hydroplaning diminishes considerably below this threshold. For drivers in regions with frequent rain or snow, this earlier replacement can provide a crucial safety margin.
- Uneven Wear Patterns: Even if your average tread depth is above the minimum, significant uneven wear can necessitate early replacement. Common patterns include:
- Center Wear: Often caused by overinflation.
- Shoulder Wear: Typically due to underinflation.
- One-Sided Wear: Can indicate an alignment issue or worn suspension components.
- Cupping or Scalloping: Usually a sign of worn shock absorbers or other suspension problems.
Uneven wear can compromise handling and safety, even if some parts of the tire still have sufficient tread. If you notice any of these patterns, it’s advisable to have your vehicle inspected by a qualified technician.
- Tire Age: Regardless of tread depth, tires also have a limited lifespan. Most tire manufacturers and organizations like the Rubber Manufacturers Association (RMA) recommend replacing tires that are 6-10 years old, even if they appear to have adequate tread. Rubber degrades over time, losing elasticity and increasing the risk of sudden failure.
Ultimately, proactive tire replacement based on these guidelines is a key component of vehicle safety and maintenance.
Frequently Asked Questions
What is the legal minimum tire tread depth in the US?
The National Highway Traffic Safety Administration (NHTSA) and most state laws in the US consider 2/32 of an inch (approximately 1.6 mm) as the minimum legal tire tread depth. When your tires reach this depth, the built-in tread wear indicators (wear bars) will be flush with the tread surface, signaling that replacement is required.
How often should I check my tire tread depth?
It’s recommended to check your tire tread depth at least once a month, or every time you check your tire pressure. Regular checks allow you to monitor wear patterns and catch potential issues early, ensuring your tires remain safe and compliant with regulations.
Can I mix tires with different tread depths?
Generally, it isn’t recommended to mix tires with significantly different tread depths on the same axle, and ideally, all four tires should have similar tread depths. Mixing tires can lead to imbalances in handling, braking, and traction, potentially affecting vehicle stability and safety. If you must replace only two tires, it’s usually best to put the new tires on the rear axle for better stability, especially in front-wheel-drive vehicles.
What causes uneven tire wear?
Uneven tire wear can be caused by several factors, including incorrect tire pressure (over or underinflation), improper wheel alignment, worn suspension components (such as shocks or struts), or unbalanced wheels. Regularly inspecting your tires for uneven wear can help identify underlying mechanical issues with your vehicle that need attention.
Is the penny test accurate enough for all situations?
The penny test is a quick and useful method for determining if your tire tread depth is at or below the critical 2/32-inch legal minimum. However, it isn’t a precise measurement tool. For more accurate readings and to track tire wear over time, a dedicated tire tread depth gauge (digital, analog, or stick) is recommended. The penny test primarily serves as a warning sign, not a precise measurement.
The Bottom Line
Maintaining proper tire tread depth is a non-negotiable aspect of vehicle safety and performance. By regularly checking your tires using the methods outlined in this guide, you empower yourself to make informed decisions about tire maintenance and replacement. Whether you opt for the quick penny test or a more precise tread depth gauge, proactive monitoring ensures your vehicle has the grip and stopping power it needs to keep you and your passengers safe on the road.
Remember, worn tires compromise traction, increase braking distances, and heighten the risk of hydroplaning, especially in wet conditions. Don’t wait until your tires are below the legal limit; prioritize your safety by understanding and acting on your tire tread depth. When in doubt, consult a professional tire technician for an expert inspection.